All in One Calculator — Guide
Everything the in-app guide covers, on one page.
1 Introduction
Welcome to All in One (aio) Calculator: an easy-to-use, modern and versatile calculator for iPhone and iPad. Now you can use the same calculator on iPhone, iPad and Mac. Easily share results using features like AirDrop, and Drag and Drop. And increase your productivity with windowed apps and Stage Manager on iPadOS.
aio Calculator supports all common calculator features and many more not commonly found in calculators. The use of fractions, common statistics functions and unit converter are a few examples.
Sign in to iCloud to sync your History across your devices.
2 Navigation
The main navigation is through the sidebar or tab bar. The sidebar is available on iPad and on larger iPhones in landscape orientation.
Note: Best viewed in portrait mode.
Most entries in the sidebar can expand (using the disclosure ›) to show additional features. The sidebar can be hidden for more screen space by touching ▥ on the sidebar. Show the sidebar using the same button which is on the navigation bar.
Use the tab bar on iPhone or iPad with less screen space to navigate app features. The same features from the sidebar are available on the tab bar.
History and Information expand in place: the entries themselves are listed in the sidebar, so a recent result can be read, or pasted into the calculator, without leaving the feature you are in.
A long touch on a sidebar row offers what can be done with it. A calculator or history row can be opened in its own window on iPad, and a history row can also be copied, shared or pasted from there. History rows answer to a swipe as well — one way for delete, copy and share, the other for pasting the expression or the result. A deleted row can be brought back with a shake or a three-finger swipe.
A value can be dragged out of a history row and dropped on the Calculator or History row of the sidebar, or into any app that takes text.
The sidebar and tab bar (•••) also offer features to eMail the developer, write a review or see the app in the App Store.
3 Settings and Context Menus
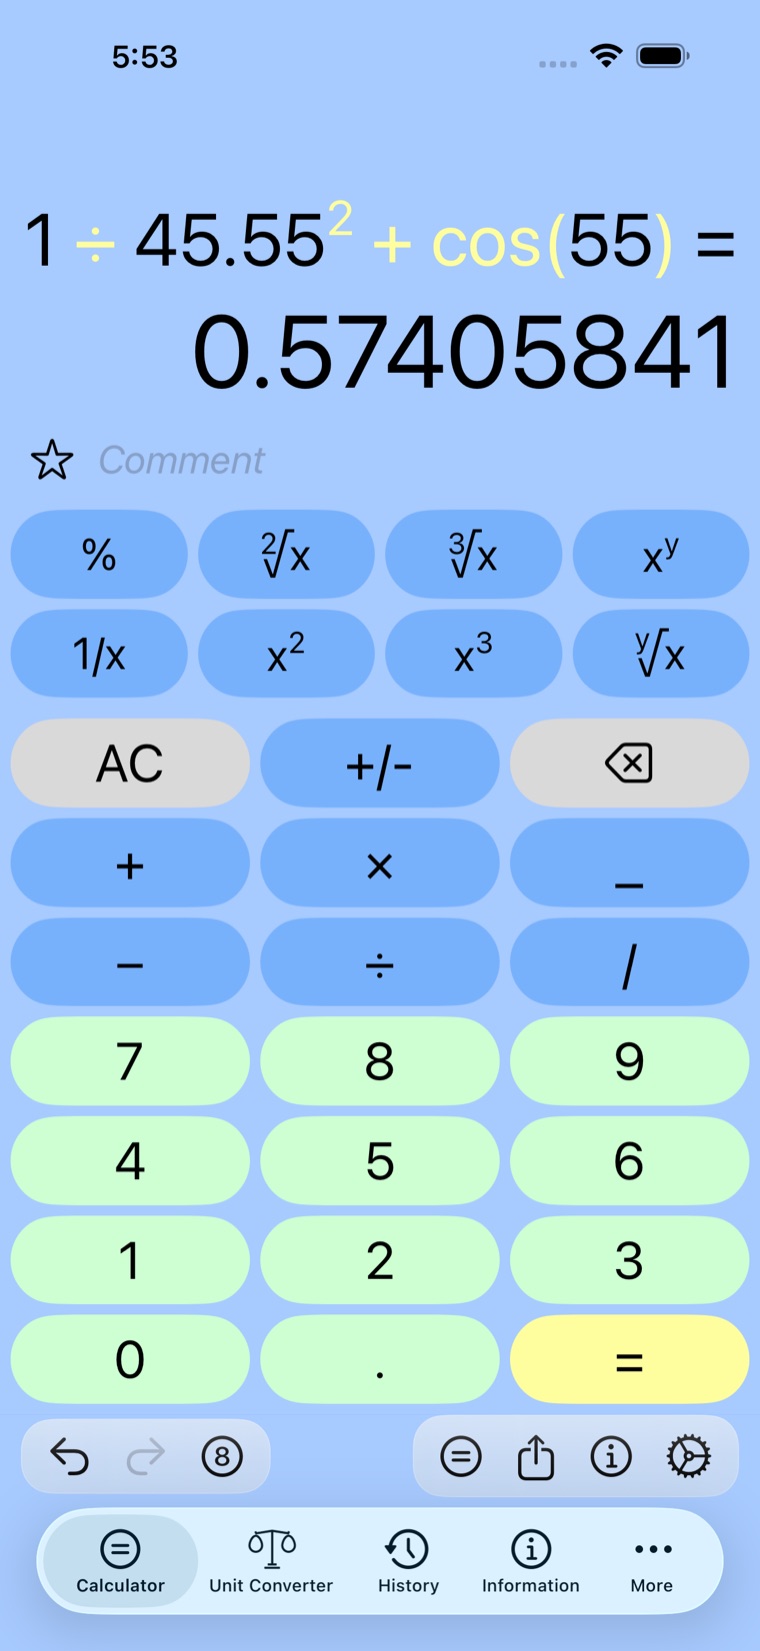
Settings allow you to adapt the app to your preference. Most settings are easily accessible by touching the settings (⚙) button on the toolbar. Here are some of the most common settings:
1) Show or hide expression in portrait. The expression always shows in landscape.
2) Show or hide the toolbar. The toolbar can also be shown or hidden with a swipe from the left or right edge of the screen.
3) Show or hide functions in portrait. Showing functions in portrait saves you from having to rotate the device to use functions normally only shown in landscape.
4) Show or hide the comment field. This allows you to annotate a result or mark it as favorite without having to use the History feature.
The settings button opens a menu with the toggles above, plus Appearance as a submenu. Appearance sets whether this app follows the device's light or dark setting or keeps its own, independent of the rest of the system. Other Settings at the bottom of the menu opens the app's page in the Settings app, where button shape, number pad location and the remaining preferences live.
Hiding the toolbar leaves a show-toolbar button on the navigation bar, so the toolbar can always be brought back without remembering the edge swipe.
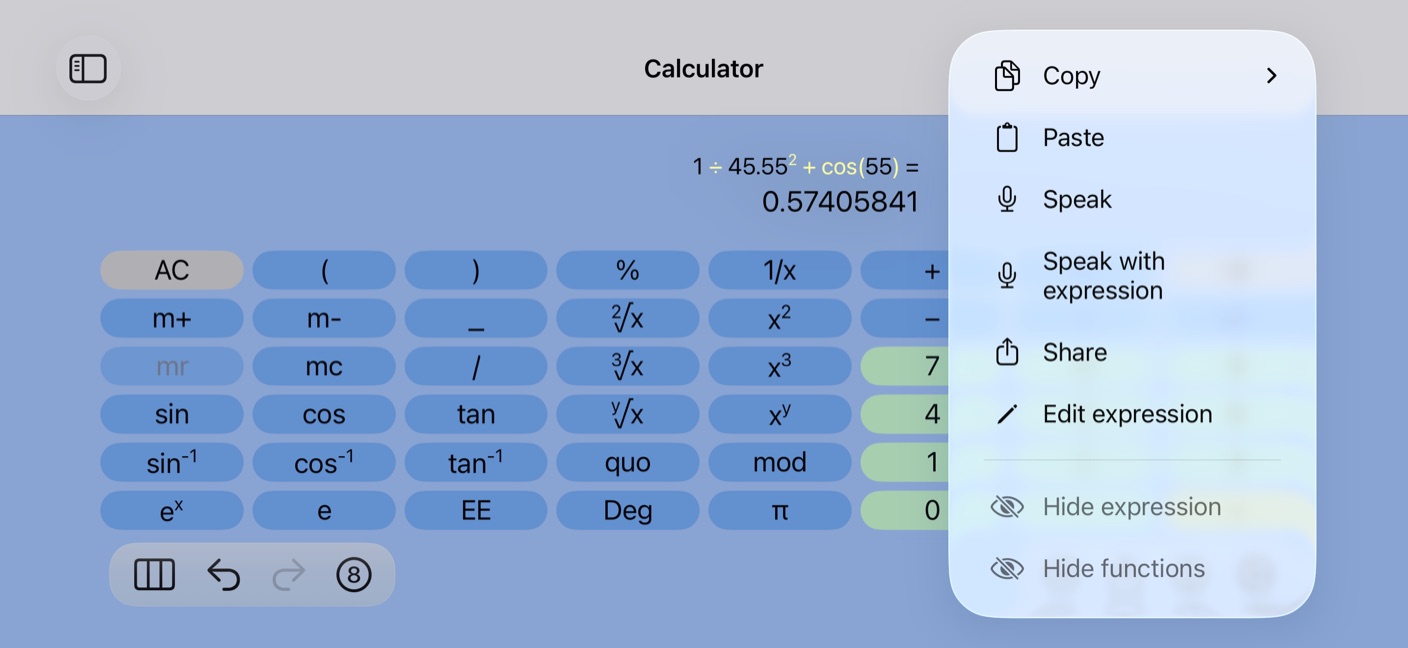
Context Menus provide access to features and settings by using a long press; for example, a long press in the calculator's results area provides access to Copy, Paste, Speak and more. Context Menus are available in all results (Calculators, Unit Converter and History).
Note: Best viewed in landscape mode.
4 Portrait Mode
The app provides basic functions in portrait.
Note: Best viewed in portrait mode.
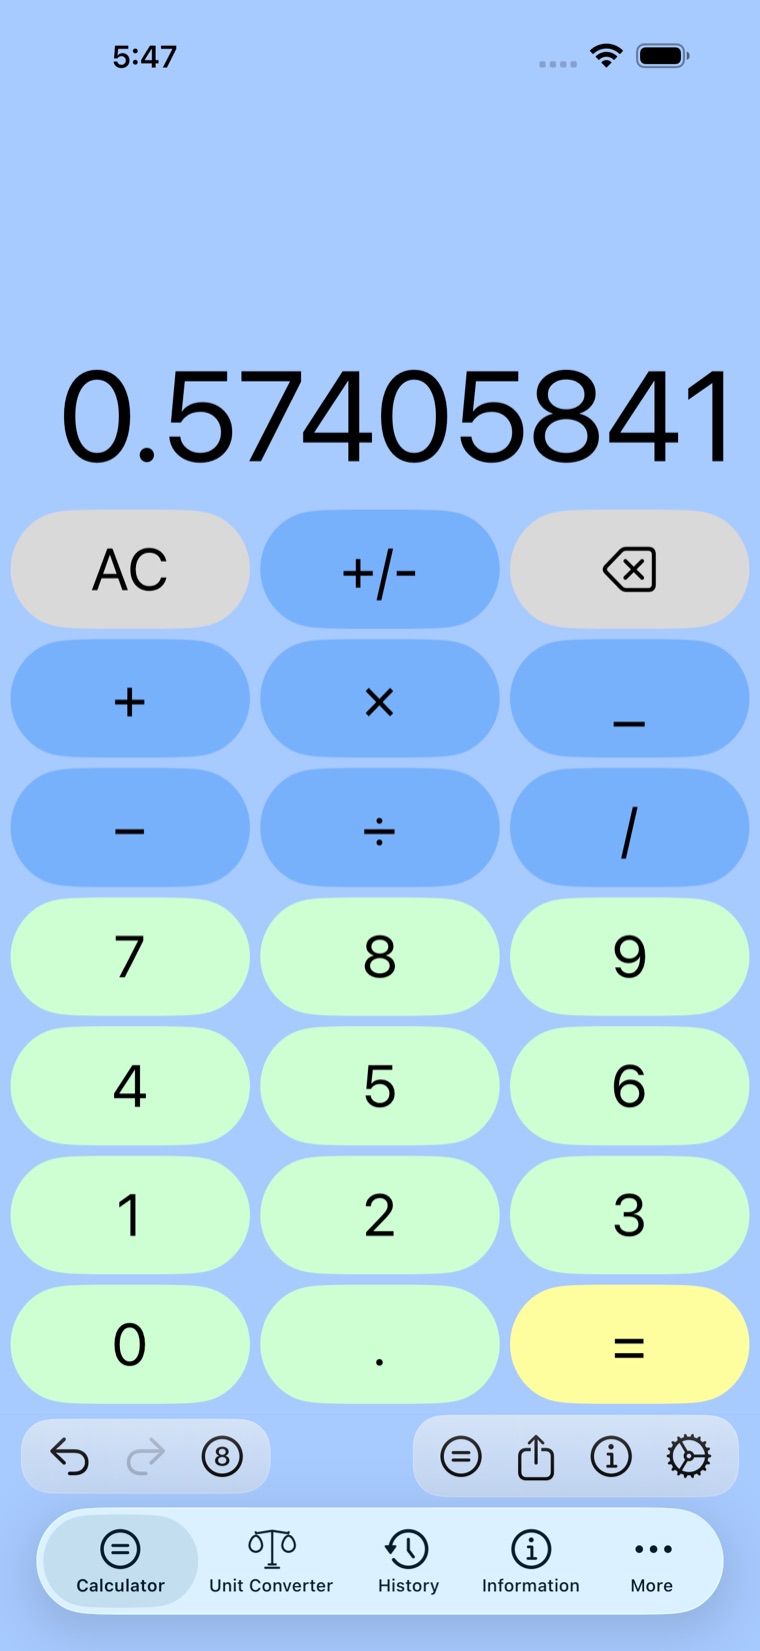
The expression always shows in landscape and can also be shown in portrait. Use Settings to show or hide the expression. The expression will show in its entirety and can be scrolled when it's too long.
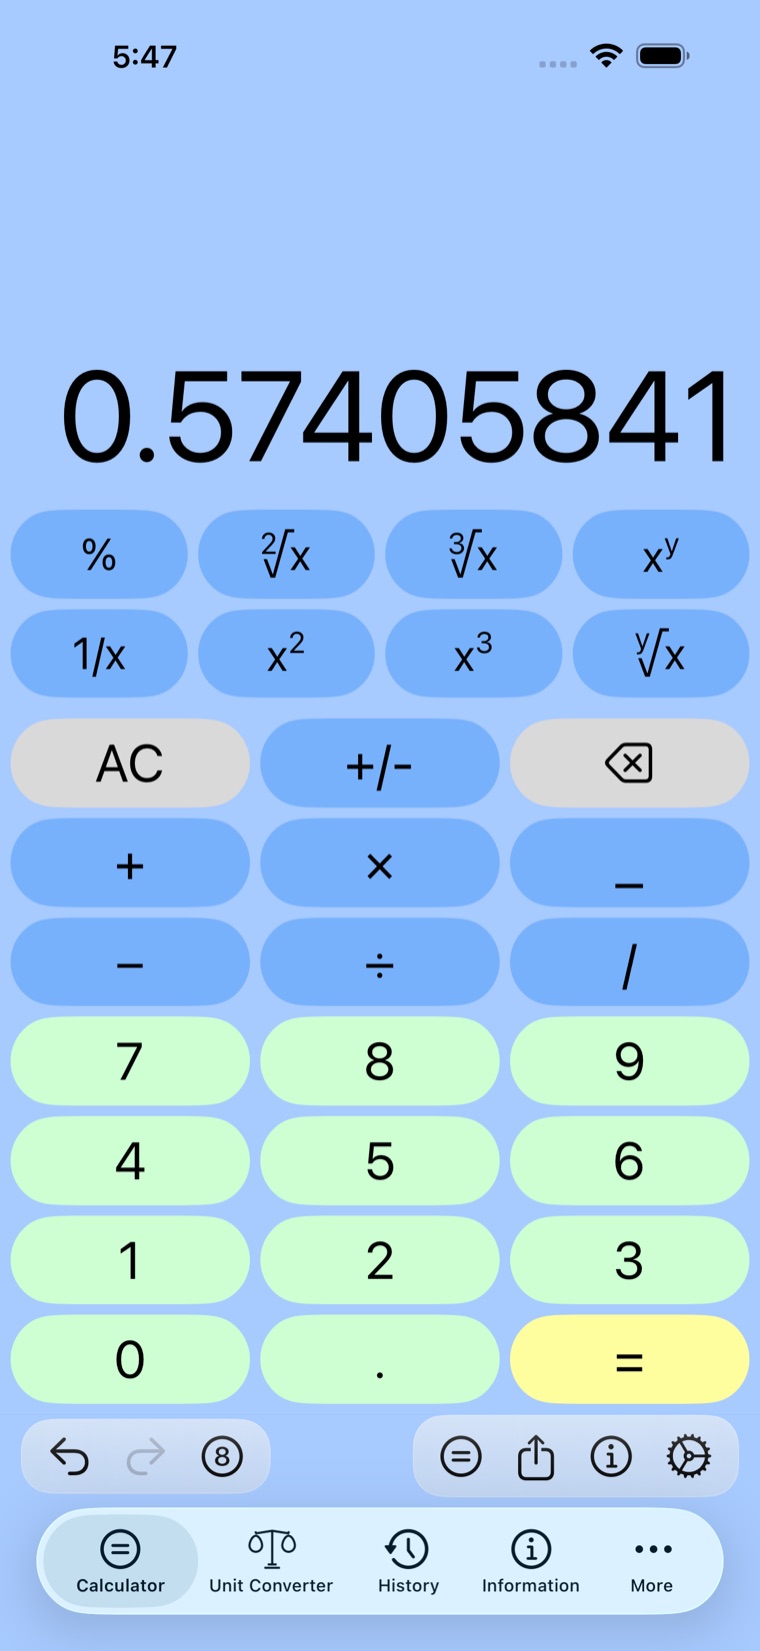
Advanced functions can be shown by using the Settings button or a pan gesture in the buttons' area. Pan down to show or up to hide. Scroll left or right to see other advanced functions. This allows use of functions normally available in landscape only.
Note: Best viewed in portrait mode.
5 Landscape Mode
The app provides more functions in landscape. Landscape orientation always shows the expression.
Note: Best viewed in landscape mode.
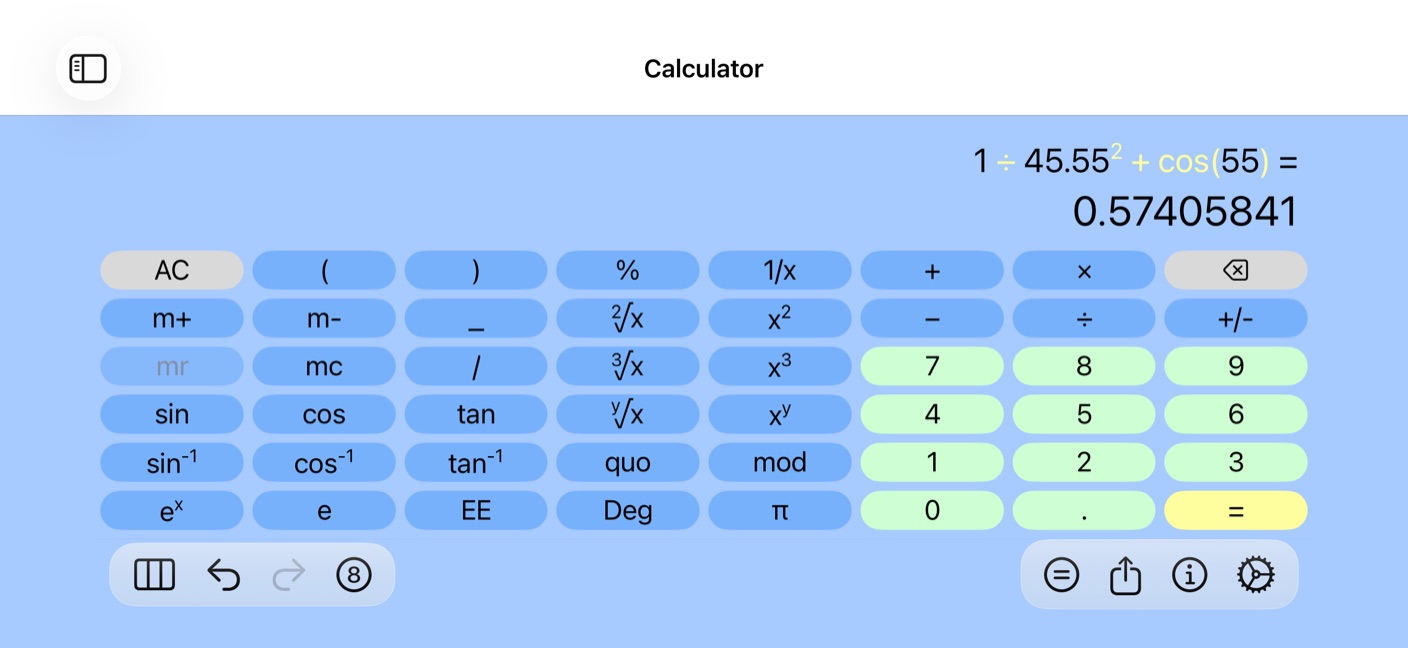
Touch the share (↑) button on the tool bar to share results (including AirDrop). Use a long press where the answer is shown for the context menu, which has Copy and Paste among other features. Even expressions can be pasted.
Note: Best viewed in landscape mode.
6 Correcting Calculations
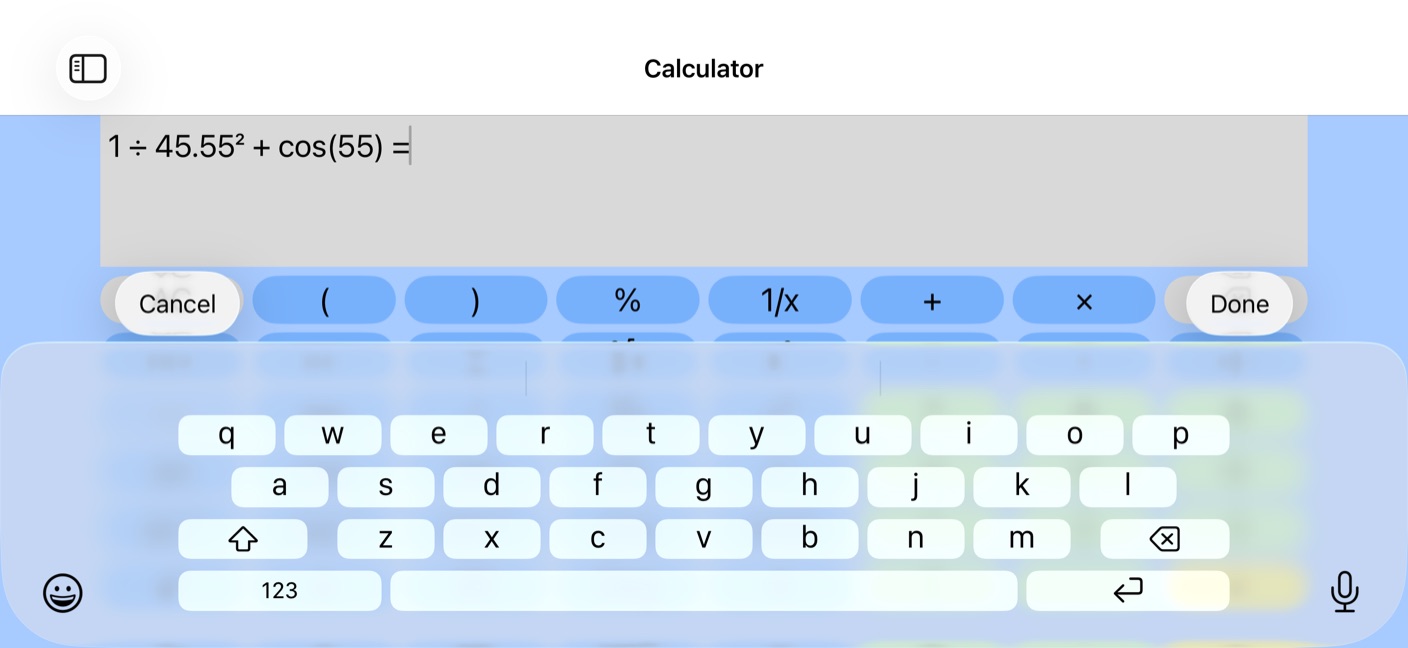
Use a swipe gesture (left or right) on the results area to delete the last digit, operator or function. This is the same as the delete button (⌫). You can even delete an operation that causes an error which saves you from having to re-enter the entire calculation. Use Undo or Redo on the tool bar at any time.
Expressions are written the way they are read: roots as ²√9, powers as 5², logarithms as log₂(8). That is the form you see in the calculator, in the History list and in anything you copy, so a copied expression can be pasted into a note or a message and still make sense.
A touch on the expression allows full editing. This allows simple corrections without having to re-enter the entire expression. Change values, operators or functions and when done the updated result will be shown. The calculator buttons and Scribble can also be used when editing an expression. A function that shows a superscript or subscript is easiest to enter with its own button, which inserts it correctly; the character itself can also be pasted, for example 5², 2³ or log₂(8).
Note: Best viewed in landscape mode.
7 Function Groups
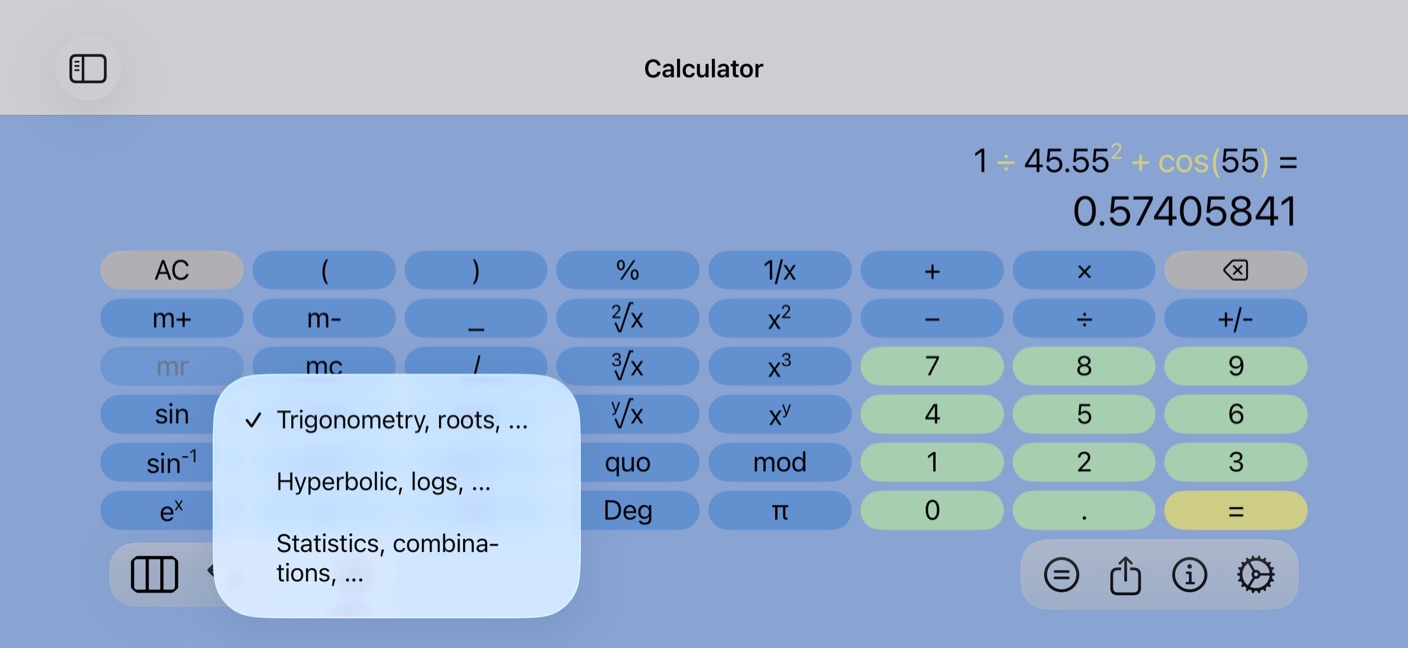
Use a swipe gesture in the functions area (sin, cos and tan) to see another group of functions. There are three function groups. Swipe to the left for the next group or to the right for the previous group. Use the Function Group button on the toolbar to see the next function group. The Function Group button has a context menu that names the three groups and marks the active one, allowing the direct selection of a group.
Note: Best viewed in landscape mode.
8 Entering a Function Before Its Value
A function normally applies to the value already entered: 45 then sin gives sin(45). When there is no value for it to apply to, the function opens a parenthesis for its value instead. Touch sin on a cleared display and the expression shows sin( with the closing parenthesis dimmed, waiting for you to fill it in.
Type the value inside the parenthesis. Operators belong to it, so the whole expression can be entered: sin 20 + 30 ) is sin(20 + 30). Touch ) to close the function; that is what ends its value. The = button closes anything still open, so a calculation is never left half finished.
The same works for √x, ∛x, log, ln, log2, x̄, σ and the trigonometric, hyperbolic and inverse functions, and functions can be nested: sin cos 30 ) ) is sin(cos(30)).
Two of them take a second value, which follows the closing parenthesis rather than sitting inside it:
• y√x takes the radicand in the parenthesis and the index after it. Touch y√x 9 ) 2 for the square root of 9. Until the index is entered, a y stands in for it.
• P(x,y) and C(x,y) take the population in the parenthesis and the number drawn after it. Touch P(x,y) 8 ) 3 ) for P(8,3).
9 Viewing Contents of Memory
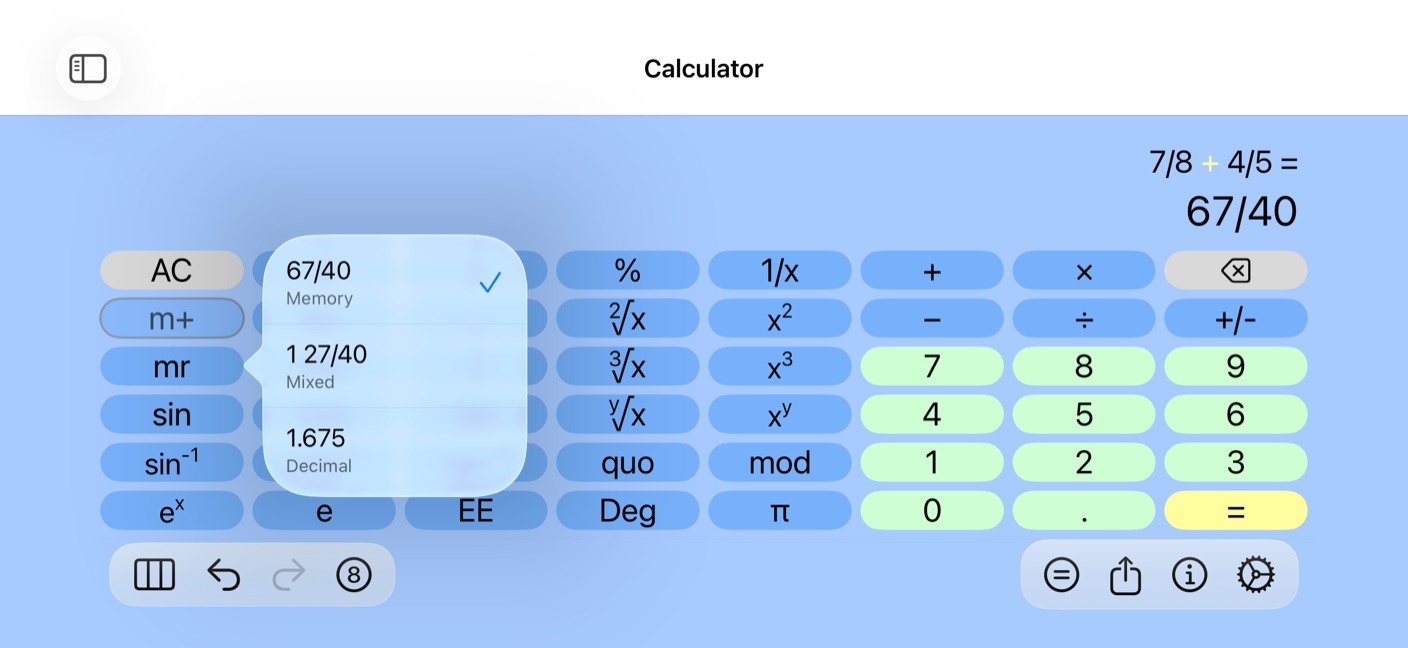
You can easily see what has been saved in memory before using it. A long touch on the mr (memory recall) button will show the contents of memory. The mr button is underlined when there is something in memory.
Note: Best viewed in landscape mode.
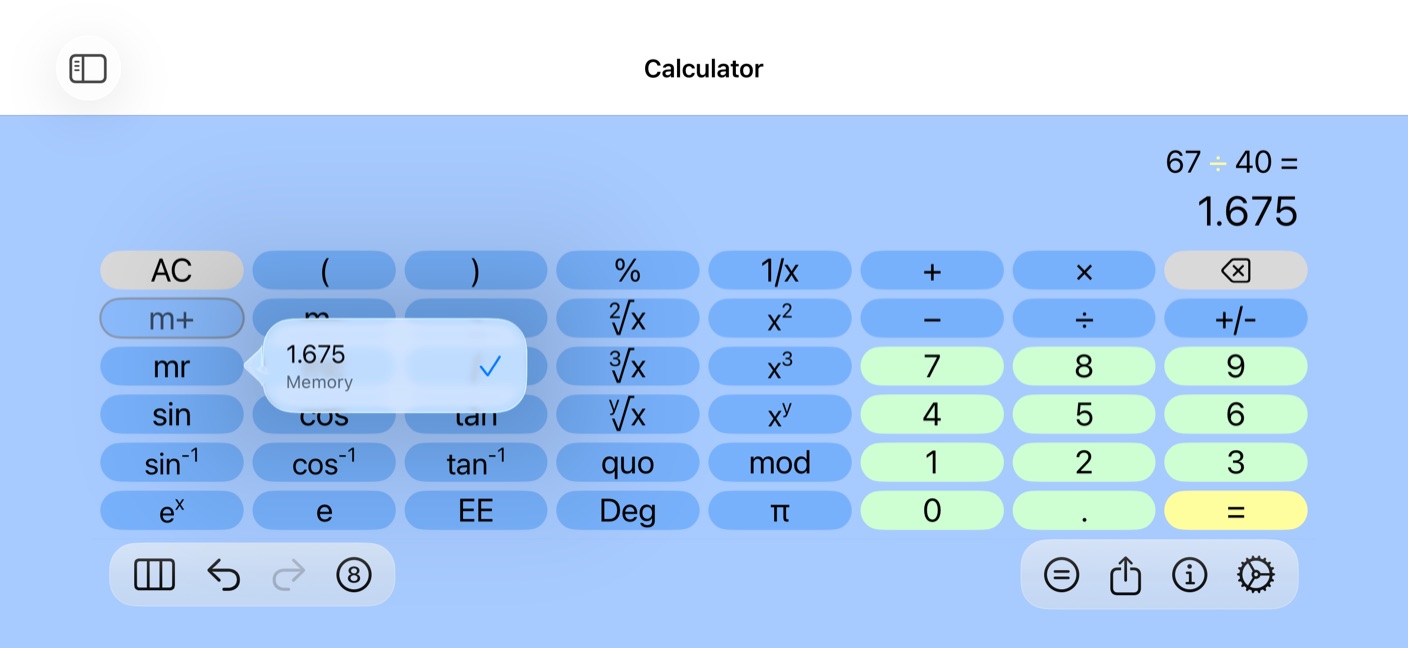
If it's a fraction then the various forms are shown. You can select which form of the fraction to recall by touching the desired form.
Note: Best viewed in landscape mode.
10 Using Fractions
Fractions are entered exactly as you would write them; for example, 1/4 + 2/3. Then touch = for the result (11/12). For a mixed fraction first enter the whole number then touch the separator button 1; followed by numerator, over button 2 and denominator.
Note: Best viewed in portrait mode.
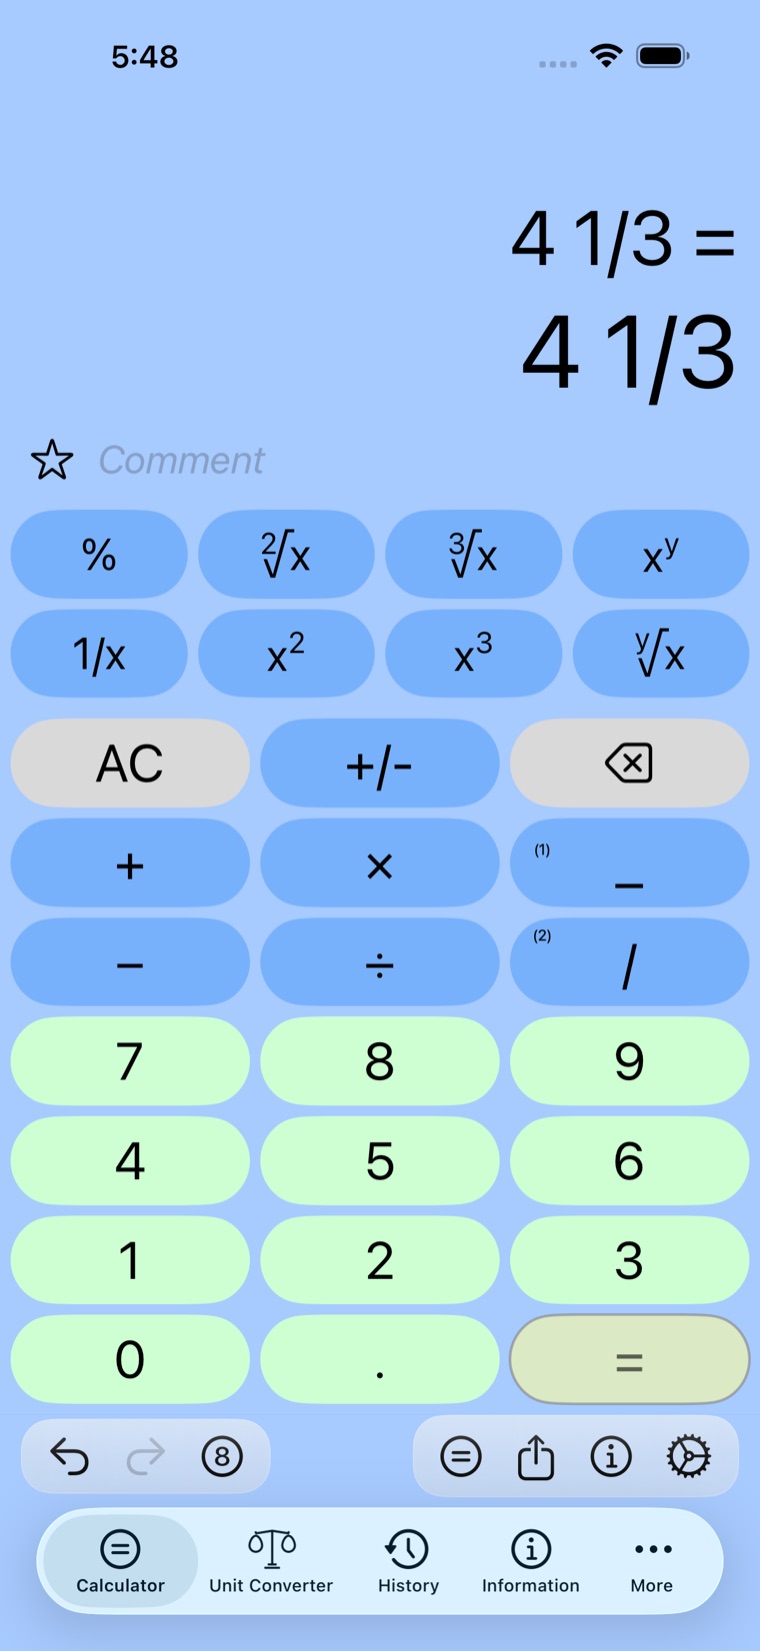
To simplify a fraction, simply enter the fraction and touch equal; for example, 480/270 = is reduced to 16/9.
If you don't use fractions then those buttons can be changed to provide other functions (described later).
11 Different Forms of a Fraction
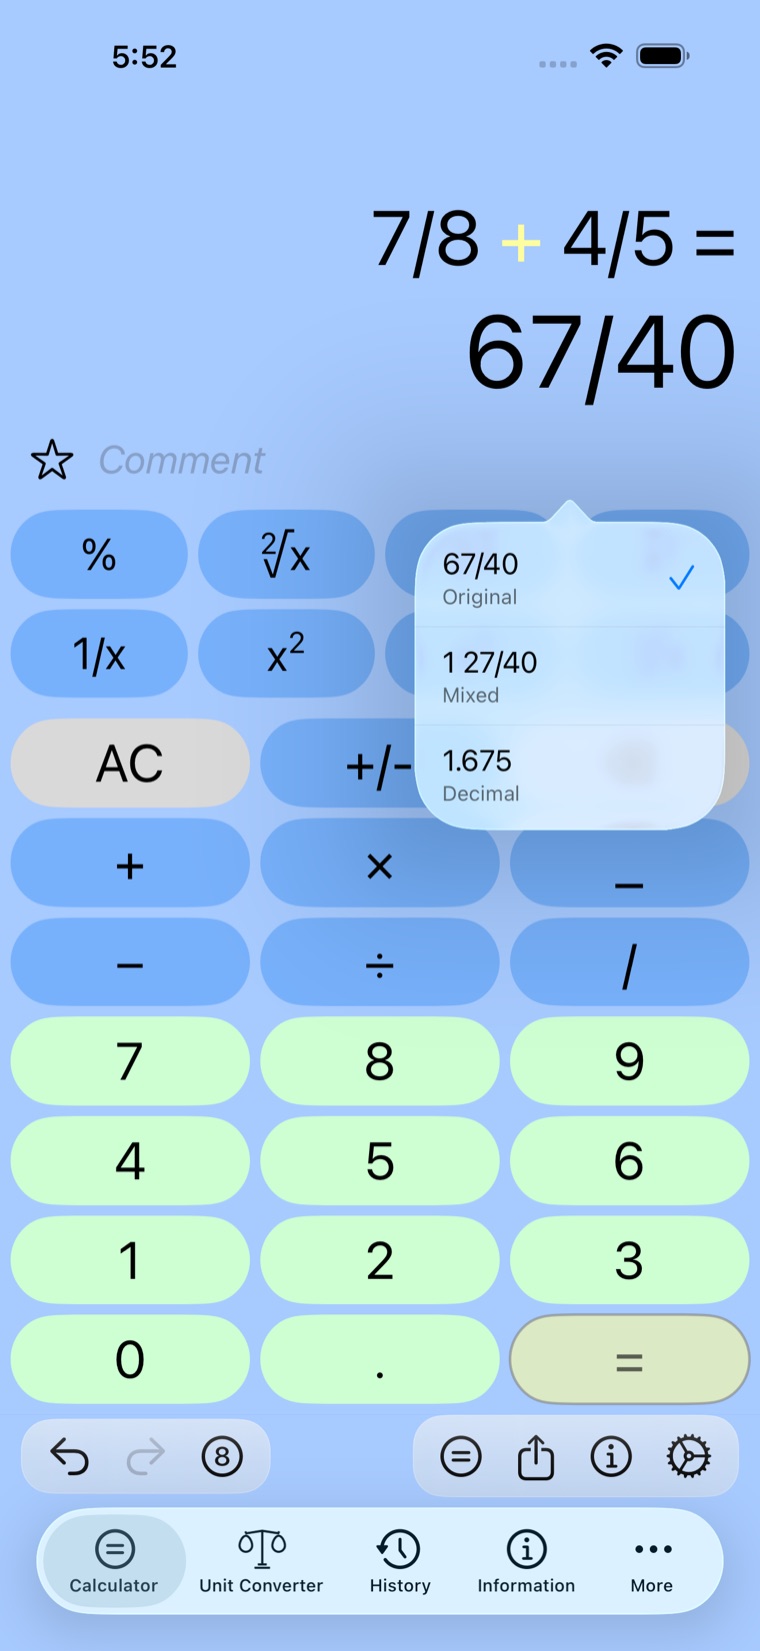
When using fractions the calculator result will show the answer with the least common denominator. The answer can be switched to a mixed fraction or its decimal equivalent by touching the fraction and selecting an available choice.
12 Change Fraction Buttons
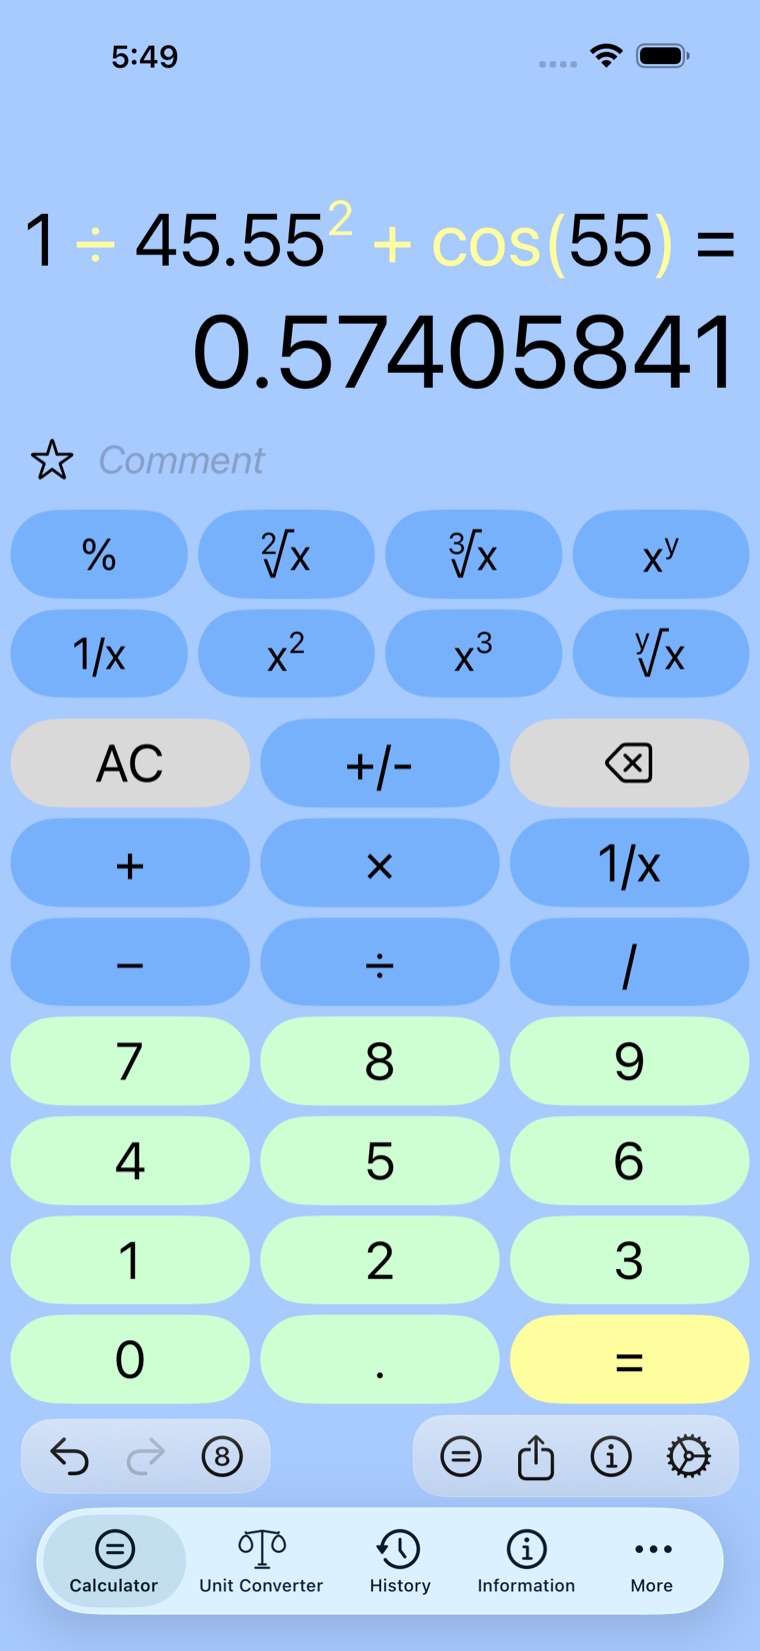
If you do not use fractions frequently you can change the fraction buttons (over and whole number) to more commonly used operations. The fraction buttons will still show in landscape mode. To change one of the fraction buttons just make a long touch on the button (this will show available choices), select the desired button and touch Done. A checkmark shows which button is in the slot now, and Done stays dimmed until you pick a different one, so the sheet can be dismissed with Cancel without changing anything. For example, to change the whole number button to the 1/x button, make a long touch on the whole number button, select the 1/x button and touch Done. A long touch only opens this sheet — it no longer also enters the function it was made on.
Note: Best viewed in portrait mode.
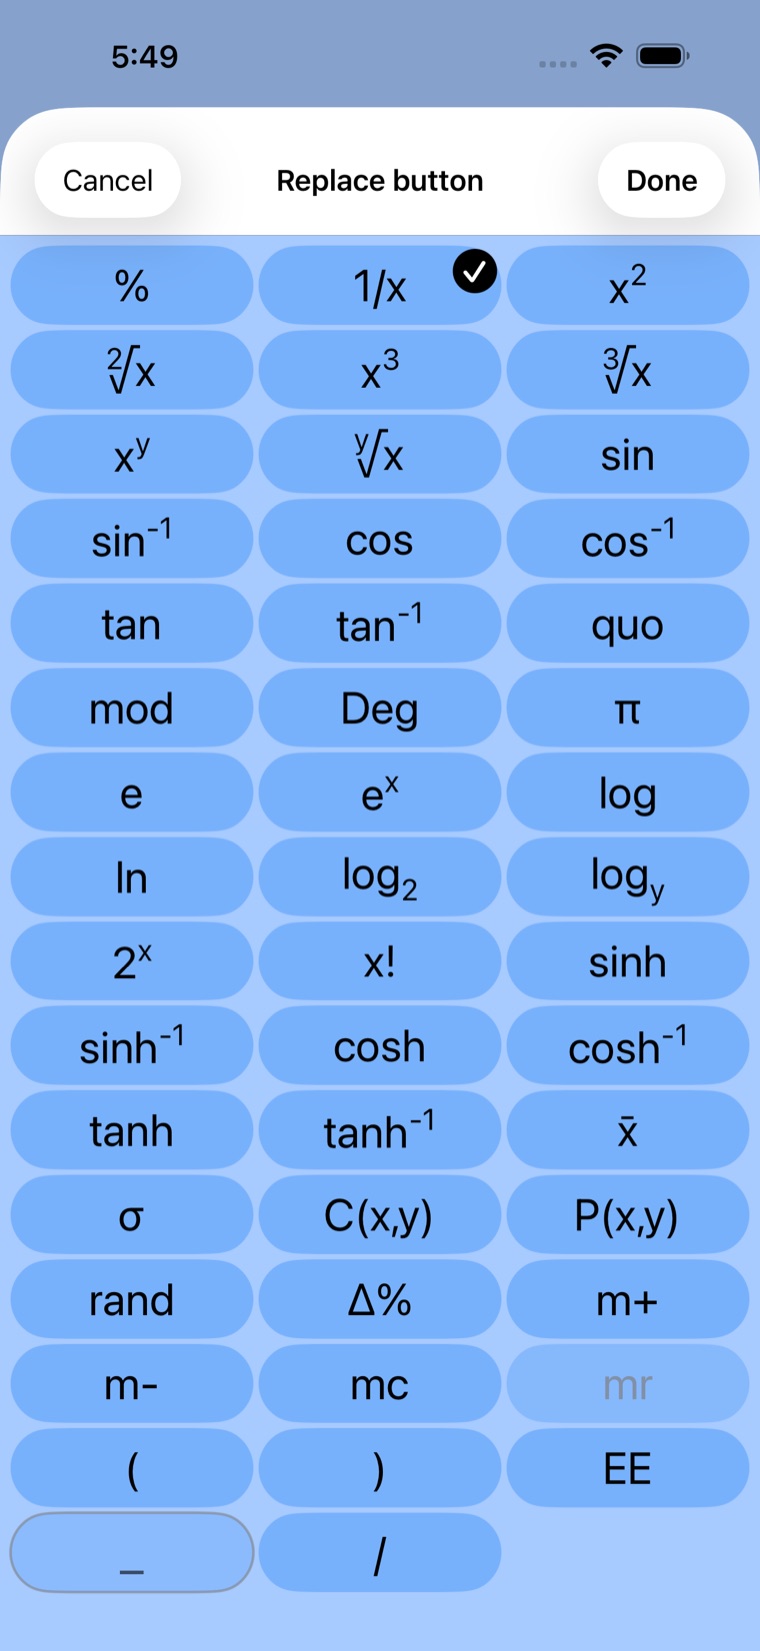
Below you can see that the whole number button has been replaced by the 1/x button.
Note: Best viewed in portrait mode.
13 Change Precision
The calculator can show results with up to 14 decimal places. The precision of results can be changed using the slider shown when the precision button (8) is touched; see screenshot above. The button shows the current precision; for example, 9. The precision button has a context menu that allows the direct selection of the desired precision.
Note: Best viewed in landscape mode.
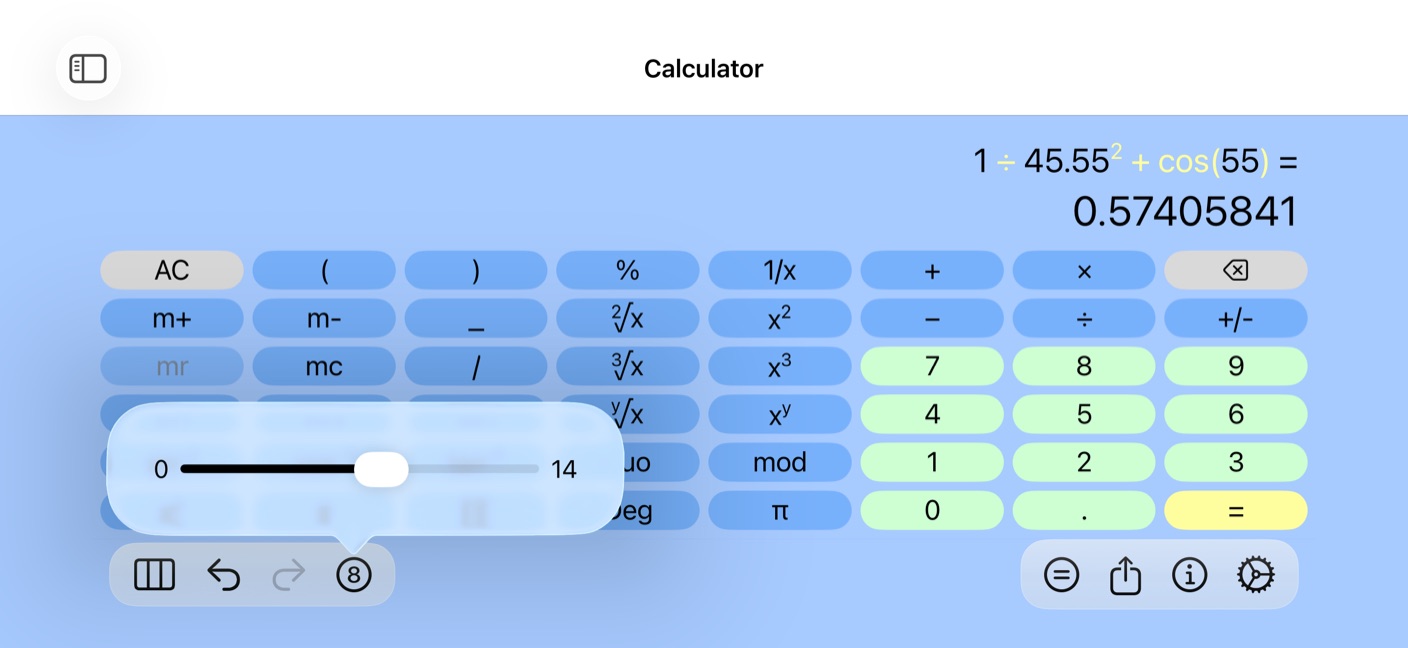
The precision can also be changed by using a pinch gesture in the results area. An inwards pinch reduces the number of decimals and an outwards pinch increases the number of decimals. The calculator will always perform internal calculations using the maximum precision.
14 Calculator Views
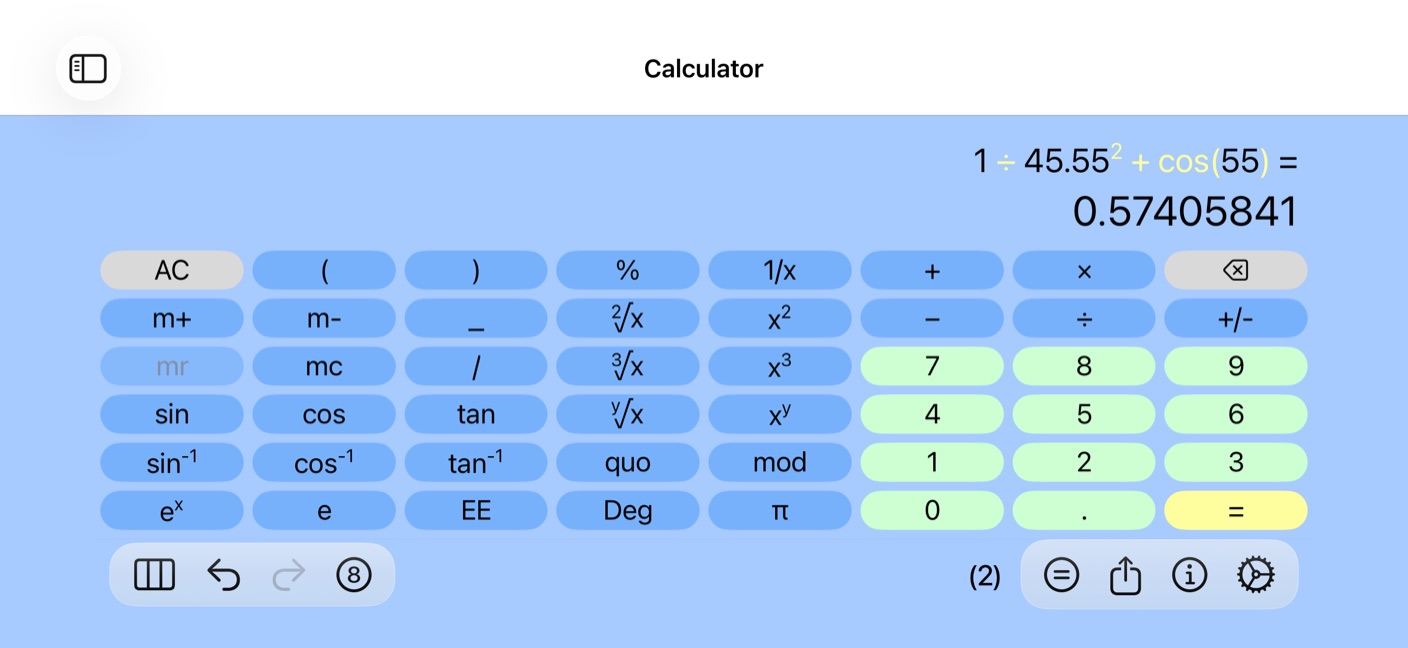
The calculator has three views. The view can be changed at any time using the calculator entry on the sidebar (1) or the button on the toolbar (2) presently showing infix (=). The most common is Infix. RPN and Programmer are somewhat specialized and described later.
Note: Best viewed in landscape mode.
15 RPN View
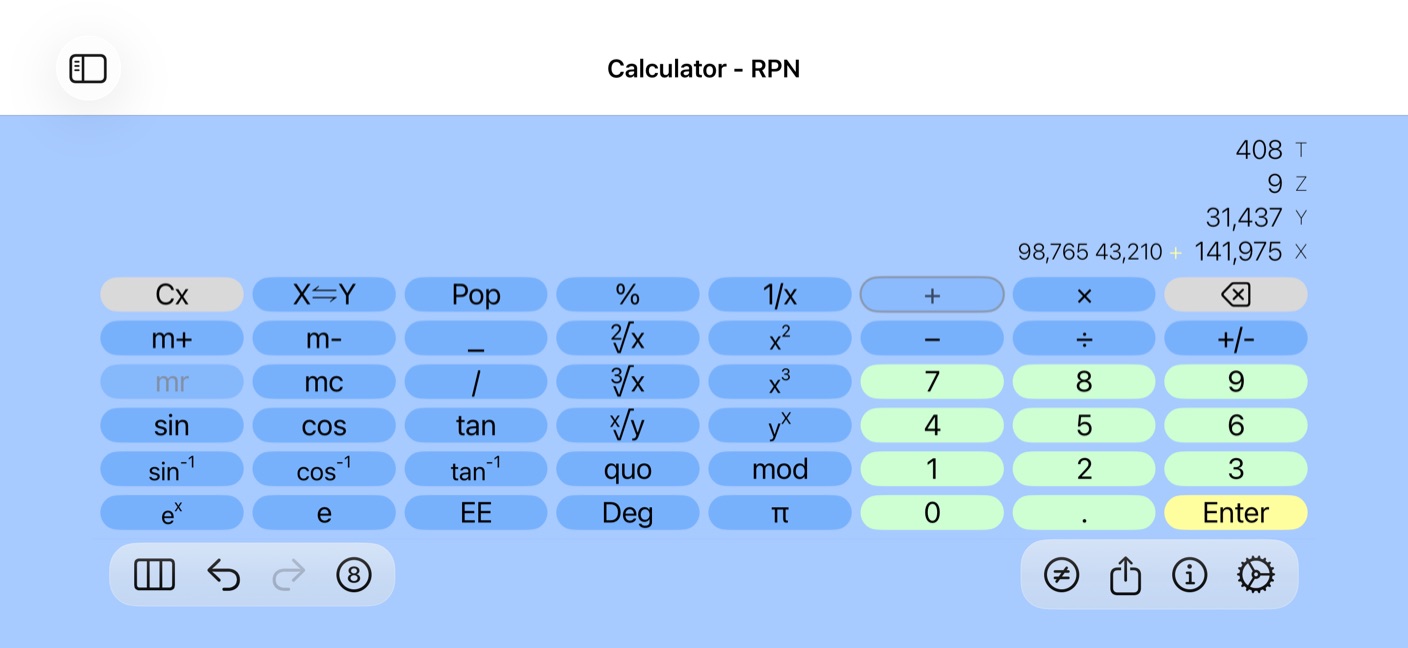
RPN is sometimes preferred for complex calculations. RPN view will show a stack with four entries in a table. The table can keep as many entries as needed. Use scrolling to see entries beyond the most recent four. Use Settings or Context Menu to show or hide the legend.
Landscape mode can show the expression that generated the result for the cell. The expression can be shown on the most recent result, on all cells or not at all. The default setting is to show the expression on the most recent result. Use Settings or Context Menu to select your preference.
A cell can be deleted with a swipe. A tap on a cell will show the edit menu. The value of a cell can be moved to another cell location by dragging it to another location. The (, ) and = buttons are replaced with common RPN buttons: X⇋Y (Swap), Pop and Enter. Use Context Menu to access more features.
Note: Best viewed in landscape mode.
16 Programmer View - Binary, Octal, Hexadecimal
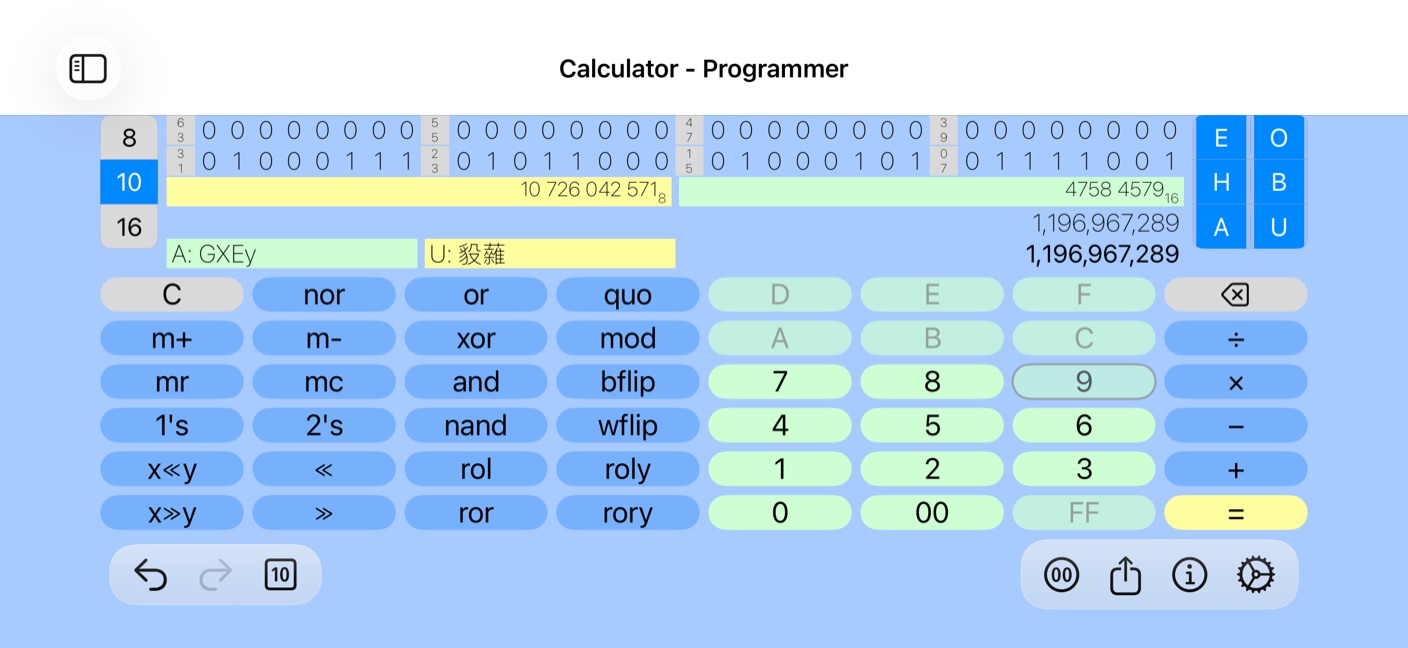
Programmer view shows decimal, octal, hexadecimal and binary; plus, the equivalent ASCII and Unicode characters. Portrait mode only shows decimal, hexadecimal and octal.
Two sets of controls sit between the result and the buttons. The first selects the active base — decimal, hexadecimal or octal — with the active one filled in blue; a base can also be activated by touching its field, or from the base button on the toolbar (10). The active base is written as a subscript on the result, so the result always says which base it is in, and the expression is shown in that base with its operators colored.
The second set decides which rows are shown, one letter each: E for the expression, O for octal and H for hexadecimal, plus B for binary, A for ASCII and U for Unicode in landscape, where those rows exist. A letter is filled in when its row is showing. Turning rows off gives the keypad the space they were using. The controls themselves can be hidden from the settings menu when the display is all you want.
On iPhone in landscape the controls move into the result area, in a column beside the values, so the keypad keeps its height.
A binary digit can be toggled by just touching it. The programmer view uses a 64-bit unsigned number. Use Context Menu to access more features.
Note: Best viewed in landscape mode.
17 Quick Actions
Quick actions are available from the app's home screen. Quick actions allow immediate access to features directly from the home screen. The available quick actions are Info, History, Unit Converter and the Calculator.
18 Examples of Special Functions - x̄, σ and More
The calculator has features not commonly found in calculators. Here's a summary with examples:
• x̄ (Average) : Calculate the average of the given numbers. The numbers must be added and in parenthesis in infix mode. The average of the entire stack is calculated in RPN mode.
Example: Calculate the average of 5, 6, and 7.
Solution: (5 + 6 + 7) x̄ = 6
• σ (Standard deviation) : Calculate the standard deviation of the given numbers. The numbers must be added and in parenthesis in infix mode. The standard deviation of the entire stack is calculated in RPN mode.
Example: Calculate the standard deviation of 5, 6, and 7.
Solution: (5 + 6 + 7) σ = 0.8165
• Δ% (Delta %) : Calculate the percent difference between the two numbers.
Example: Calculate the delta percent from 80 to 100.
Solution: 80 Δ% 100 = 25
• P(x,y) : Calculate the number of permutations — the number of ways to draw y items from a population of x, where the order matters. Enter the population first, then the number drawn. The expression is written the way it reads: P(8,3).
Example: How many ways to draw 3 marbles from a sack of 8?
Solution: 8 P(x,y) 3 = 336
• C(x,y) : Calculate the number of combinations — the same, but the order doesn't matter. Written C(8,3).
Example: Same as above, but the order doesn't matter.
Solution: 8 C(x,y) 3 = 56
• quo : Calculate the quotient of a division.
Example: Calculate the quotient of 75 divided by 30.
Solution: 75 quo 30 = 2
• mod : Calculate the remainder (modulus) of a division.
Example: Calculate the remainder of 75 divided by 30.
Solution: 75 mod 30 = 15
19 History of Results
The calculator's History feature saves expressions and results which can later be recalled, shared or viewed for reference. The History feature is seen using the sidebar or tab bar. The History feature shows a list of saved calculations in a table. The sidebar can also be expanded to show all entries.
The Edit button on the navigation bar allows working with groups of rows. The most recent calculations are always shown first. The title shows the total number of entries in the table.
History can be shared across your devices through iCloud. This is off until you ask for it: turn on Sync via iCloud in the app's settings (Settings app → aio Calculator → History) and the entries saved on one device appear on the others signed in to the same iCloud account. The change takes effect the next time the app starts. With it off — the default — everything stays on the device it was calculated on.
Note: Best viewed in portrait mode.
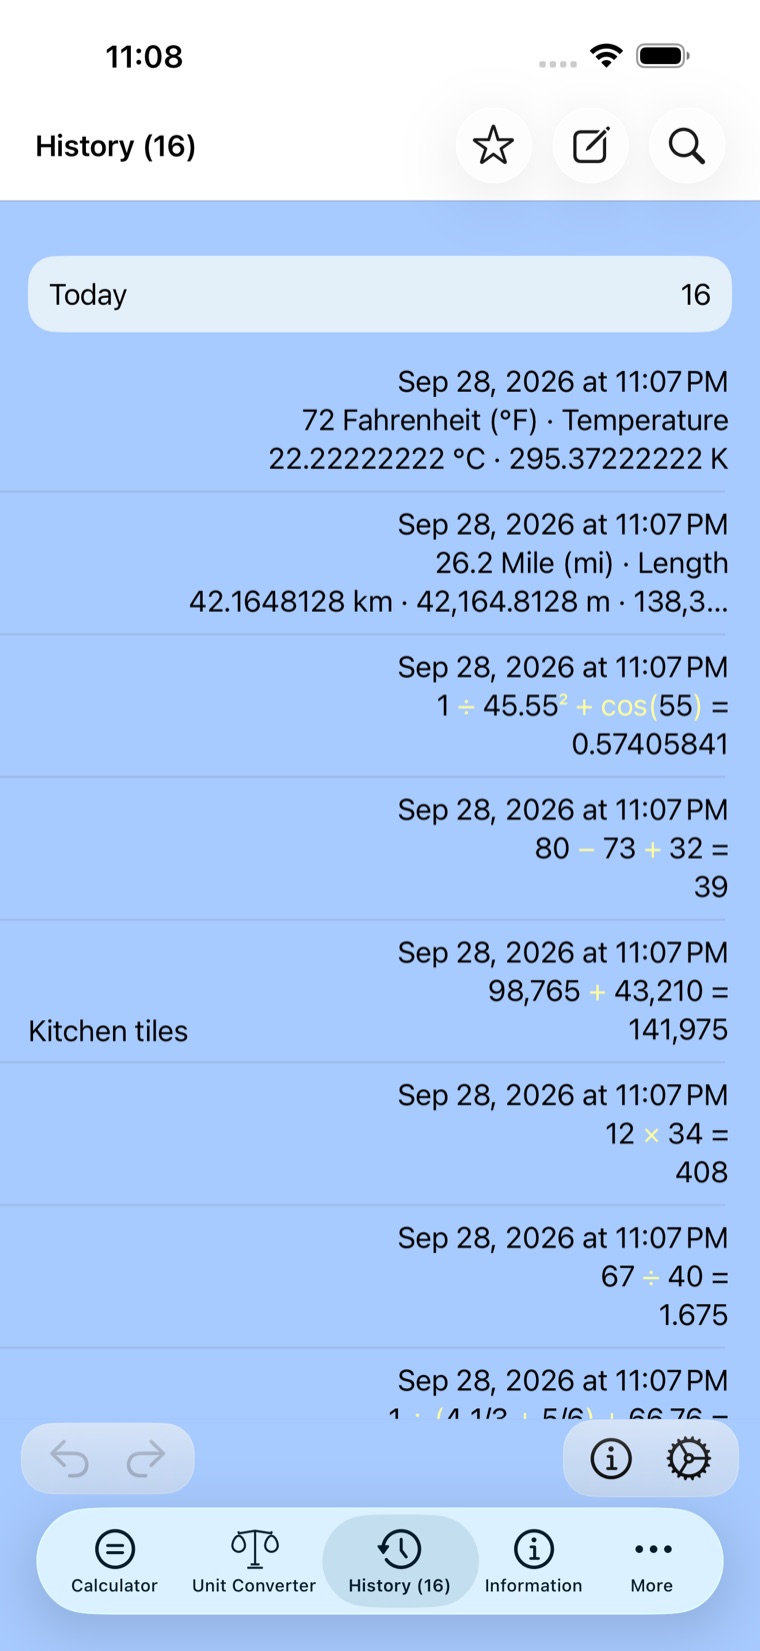
The favorite button (☆) on the navigation bar allows showing entries marked as favorite.
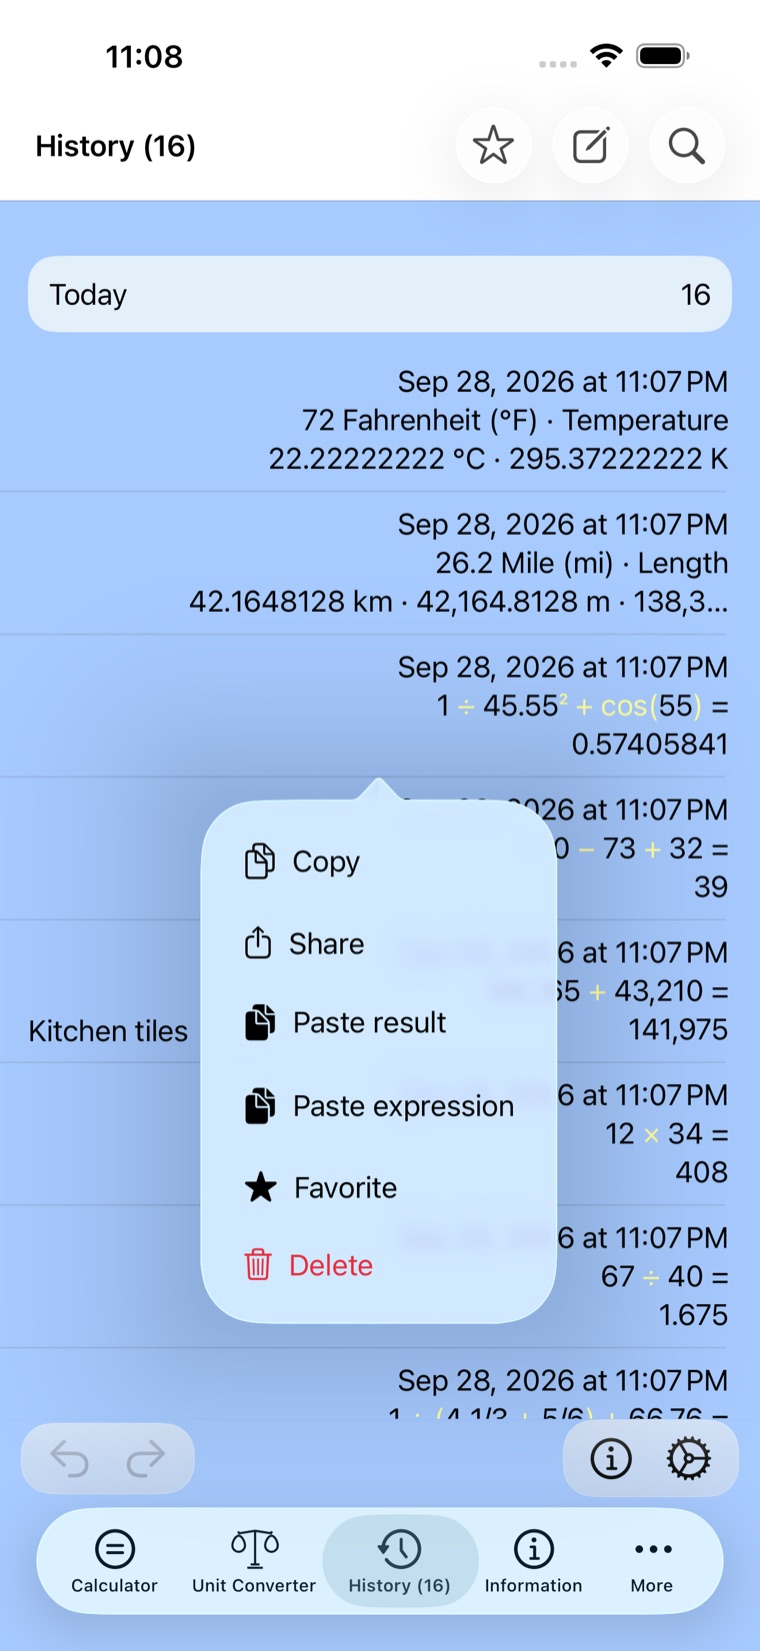
Each row will have the date of when the calculation was performed, the expression and the result. An optional comment can also be entered by just touching the area under the date or to the left of the result. Touching a row opens a menu of what can be done with it, alongside the row itself: paste the expression or the result back into the calculator, copy it, share it, hear it spoken, mark it a favorite or delete it. Only expressions in the matching operator mode can be pasted. Or the row can be protected which prevents it from being automatically deleted. A protected row can be manually deleted.
Use Context Menu to access features available for each row. Basic features are available by touching the date, expression or results area in the desired row and select from the available choices.
Note: Best viewed in portrait mode.
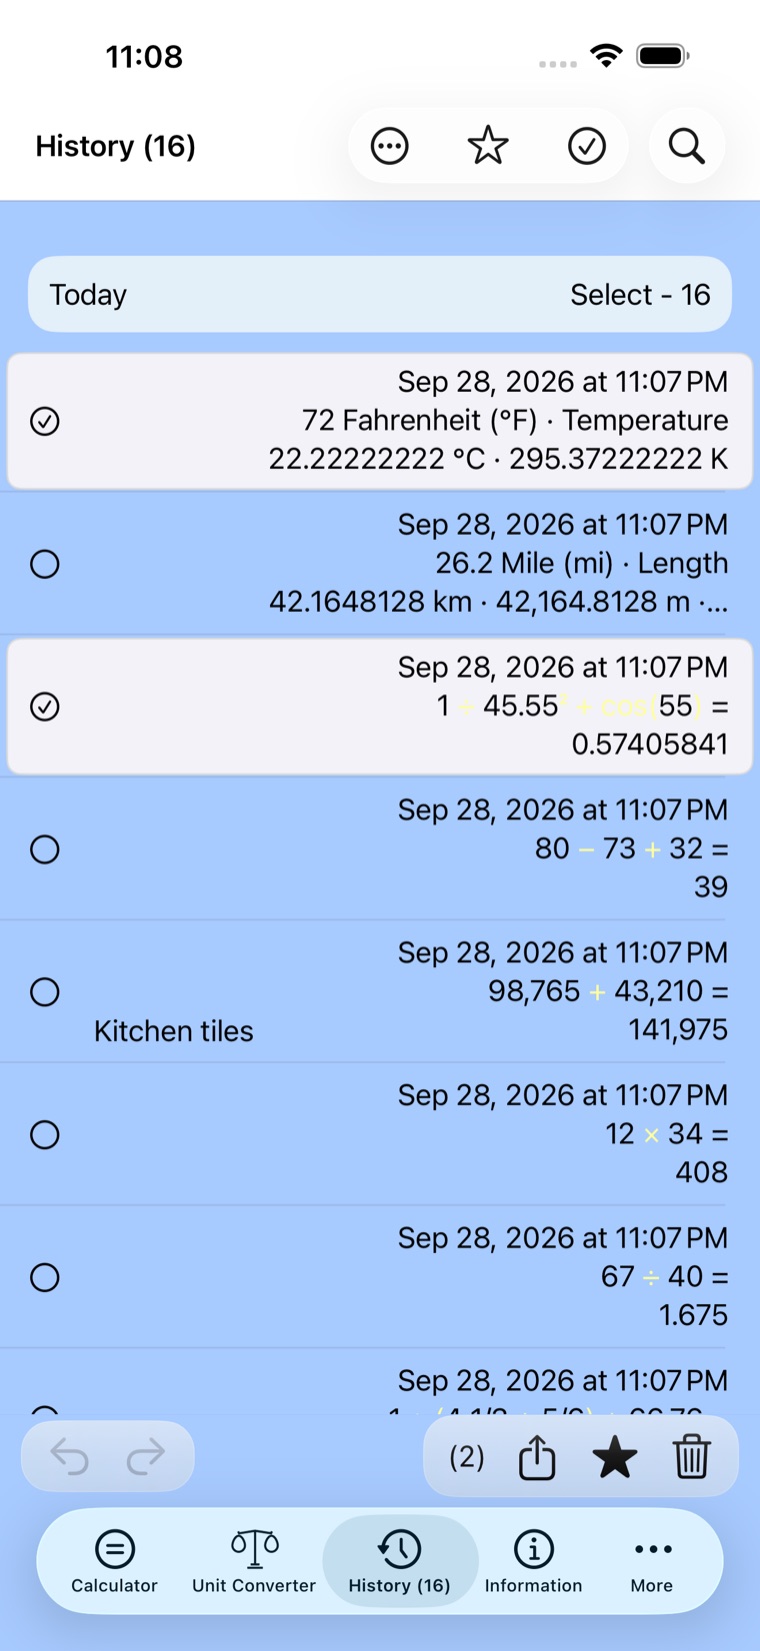
Touching Edit allows operations on groups of rows. Individual rows can be selected by touching the row. Use ••• on the navigation bar to select all rows, invert the selection or clear it. Selected rows can be shared, deleted or made favorites. A row can also be deleted using a swipe gesture on the desired row. You can Undo (or Redo) row deletion. The number on the bottom is the total number of selected entries in the table. Use the Search feature to find a particular row. The scope button allows the date to be ignored during a search.
Note: Best viewed in portrait mode.
History also saves conversions from the Unit Converter, listed alongside calculations in the same date order. A conversion's row shows the value and unit you entered, the measurement, and other units. Use Settings in History to show calculations only, conversions only, or both.
Touching a conversion's row offers Paste to Converter, which restores the value and unit back to the Unit Converter.
Use Settings in History to select how long entries are saved or if they are saved at all. By default, the History feature is active and results are saved for one month. Favorite rows must be manually deleted. Conversions are saved and deleted on the same terms as calculations.
20 Using AirDrop
Accepting sharing via AirDrop saves the content in the History table. The comment will be prefixed with the word AirDrop to distinguish the entry from other entries. In the History table the content received via AirDrop can then be pasted for further use or viewed for reference.
21 List of Powers of 2
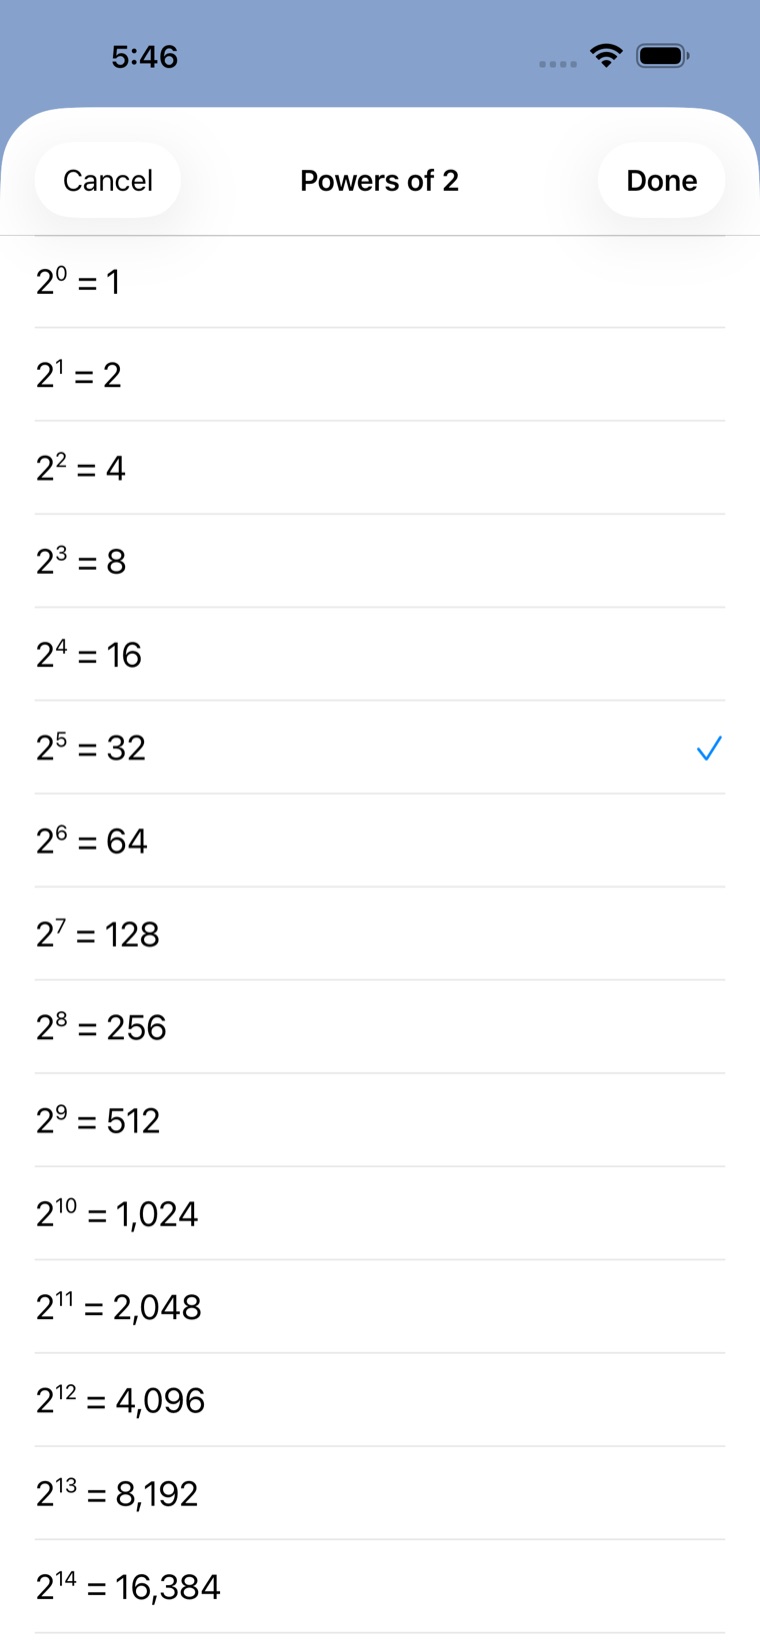
See a list of powers of 2 (up to 63) by doing a long touch on powers of two button. If you want to use any of them just select it.
Note: Best viewed in portrait mode.
22 Info Text
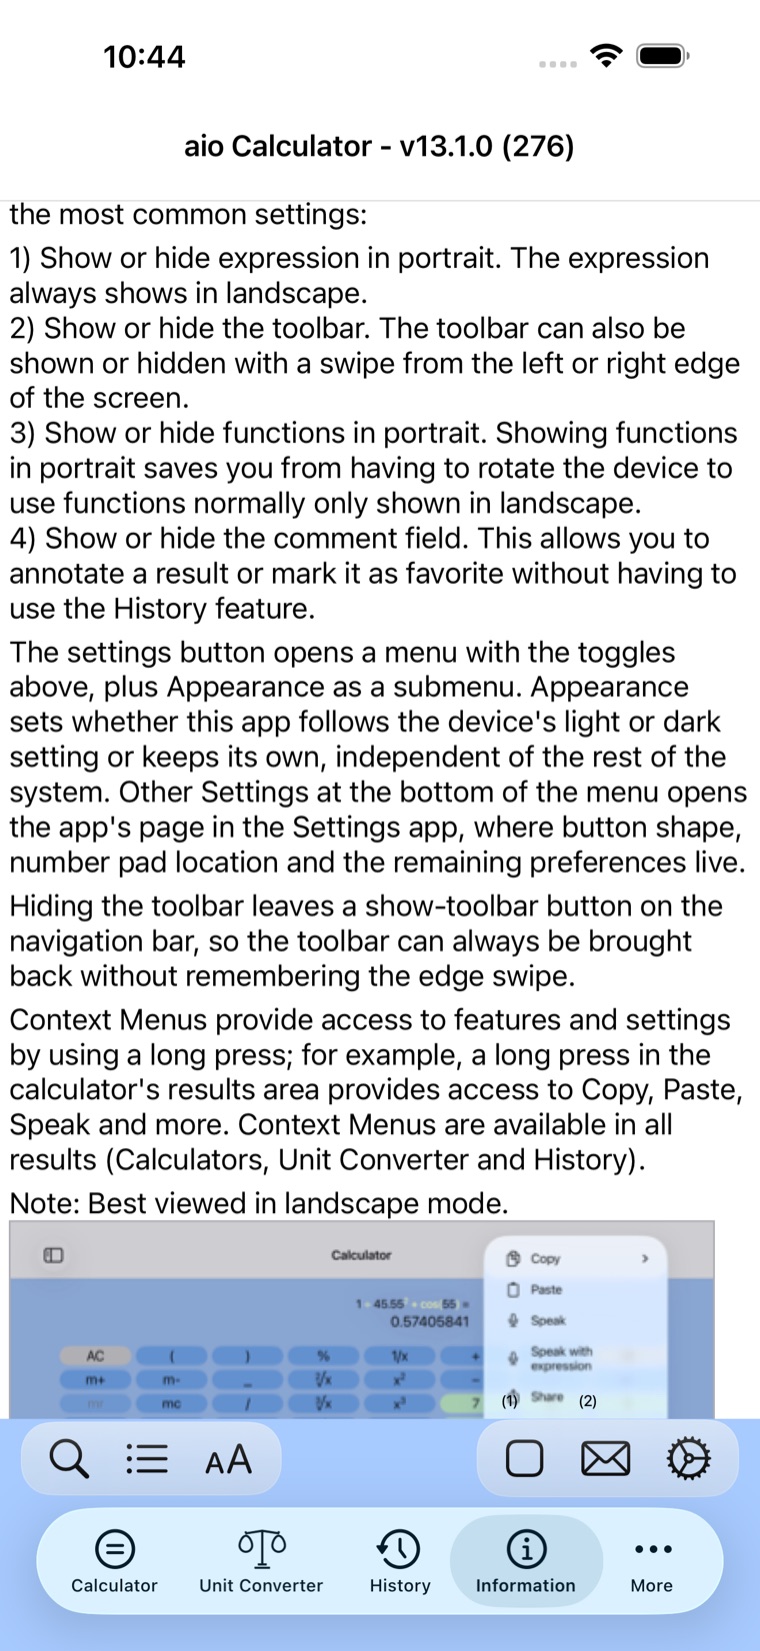
Info is available at any time using the sidebar or tab bar to see detailed information about the app. The sidebar can be expanded to select a specific topic. Info is also available on the tool bar (ⓘ). Easily provide a rating by using the ratings button 1. Communicate with app support via email 2 to request new features, report a problem or ask questions using the email button. Use table of contents or Search button to find specific topics. The text size can be adjusted using the text size button (A).
Note: Best viewed in portrait mode.
23 Unit Converter
The Unit Converter is available at any time using the sidebar or tab bar. The sidebar can be expanded to select a specific measurement. The Unit Converter converts to all available units within a selected measurement. The conversion can be done directly with a value from the calculator, a value entered into the converter (without changing the value in the calculator) or a value dropped from the calculator's sidebar or from another app.
To convert the value from the calculator simply select the measurement and then touch the name of the unit. All available units are converted using the value from the calculator. Touch under the unit's name to enter another value. Touch Edit on the toolbar to select units and mark them as favorites.
Note: Best viewed in portrait mode.
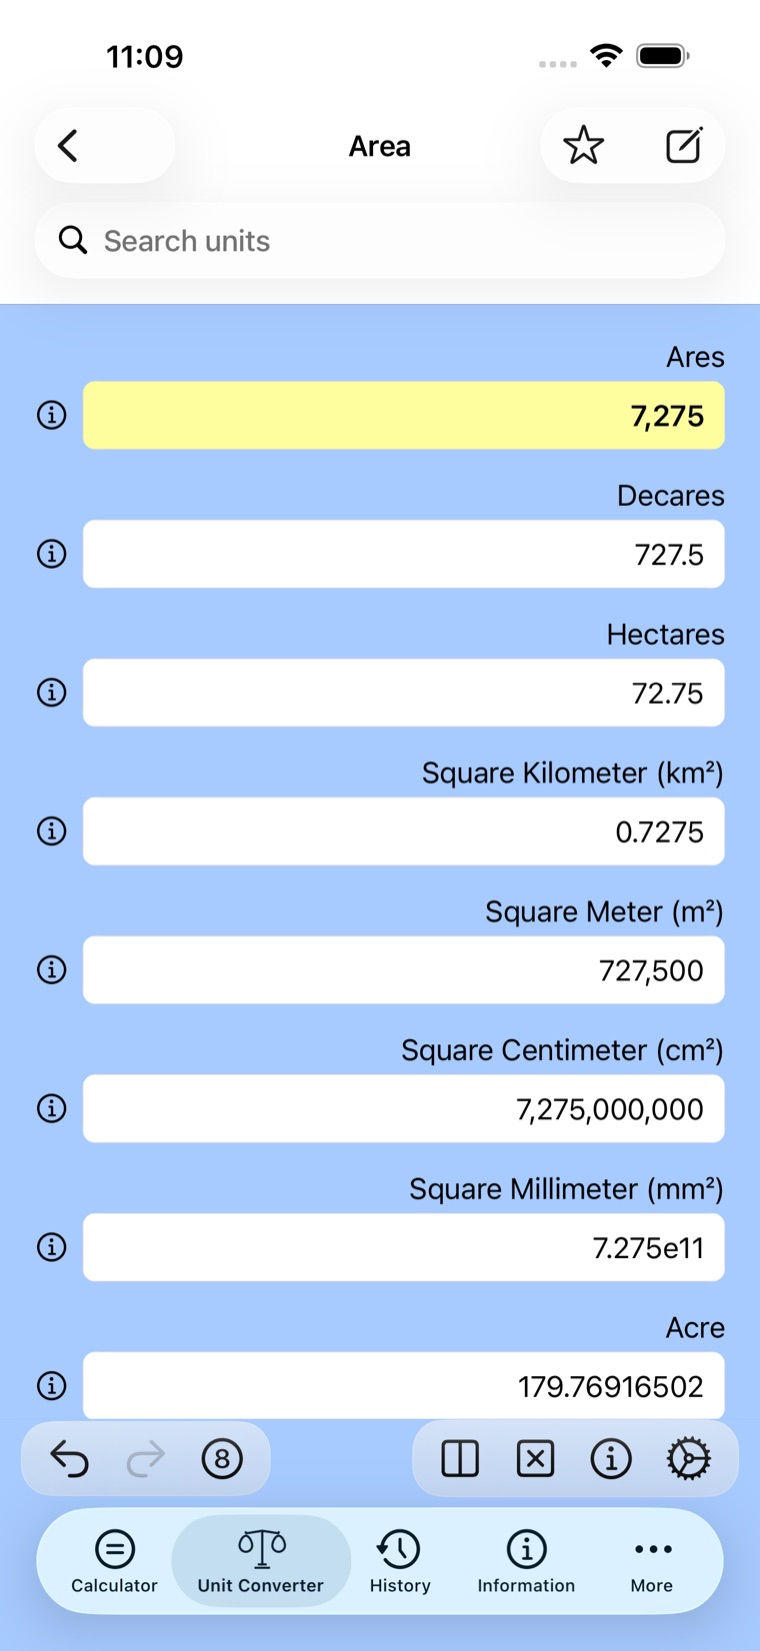
A favorite button (☆) on the navigation bar allows showing of entries marked as favorite.
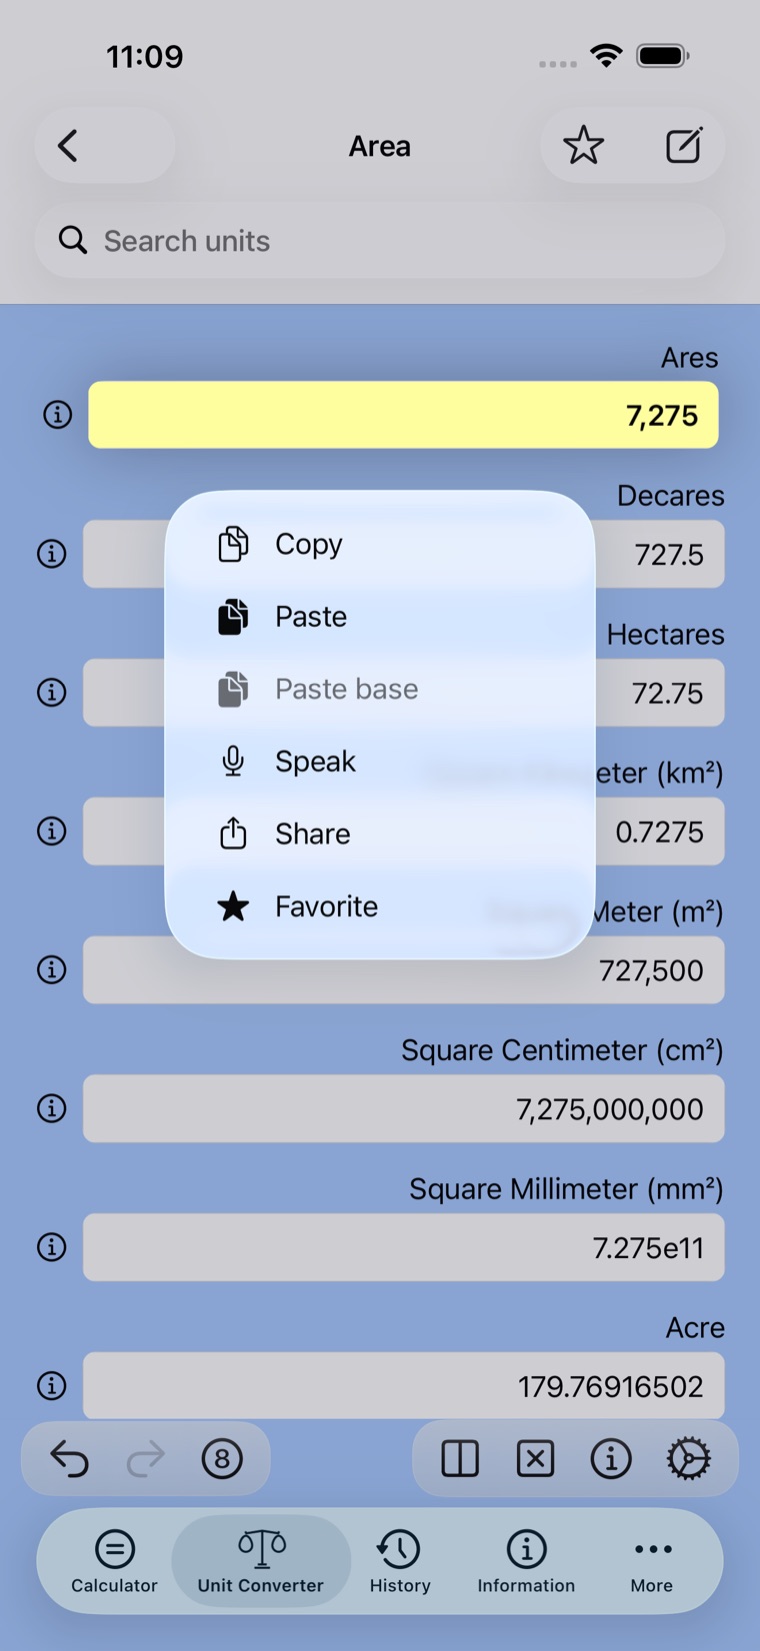
Use Context Menu on the measurements title to access features on the measurement. Selecting Paste will put the value back in the calculator. Copy allows the value to be pasted into another app. Share allows sharing; including AirDrop. History will save the conversion in the History table.
Note: Best viewed in portrait mode.
Turn on Show comment in the converter's settings menu for a comment field above the units. The comment belongs to the conversion saved in History, so it stays with that entry — starting a new conversion starts a new comment, and the field is empty until a conversion has been saved.
An internet connection is required to use Currency. Data for currency conversion is downloaded periodically. The currencies are shown in alphabetical order (mostly) by country. There are many currencies available but only a small number are shown initially. Use Edit to select the currencies to show.
24 Multiple Windows
On iPadOS, Calculator, Unit Converter, History, and Info can each open in their own window. To open a sidebar feature or item in a new window, touch and hold it and choose Open window, drag it to the left or right edge of the screen, or pinch outward on it. The ⊞ button opens the feature you are currently viewing in a new window.
To discard a window use the ⊟ button on the navigation bar where it is shown, or close it the way you close any other window on iPadOS.
25 Widget
The app offers a widget to view recent results. The number of results shown depends on the size of the widget used. All existing widget sizes are available.
The widget can be edited to change the precision of results.
26 Spotlight Search
Spotlight is an easy way to find almost anything on your iPhone or iPad. Now you can also search for content in the app. Adjust the content that can be searched in Settings for Spotlight. Search can be for contents in the History table (comment field, expression and results), a unit conversion, Info feature topics or an activity like using the Info feature.
27 Accessibility Features
The app supports commonly available accessibility features such as VoiceOver and Voice Control. All applicable VoiceOver gestures are available. The Magic Tap gesture (two-finger double tap) is the same as the equal sign. Escape also dismisses screens when possible. Gestures that could conflict with VoiceOver gestures are disabled when using VoiceOver.
28 Quick Guide for Onboarding
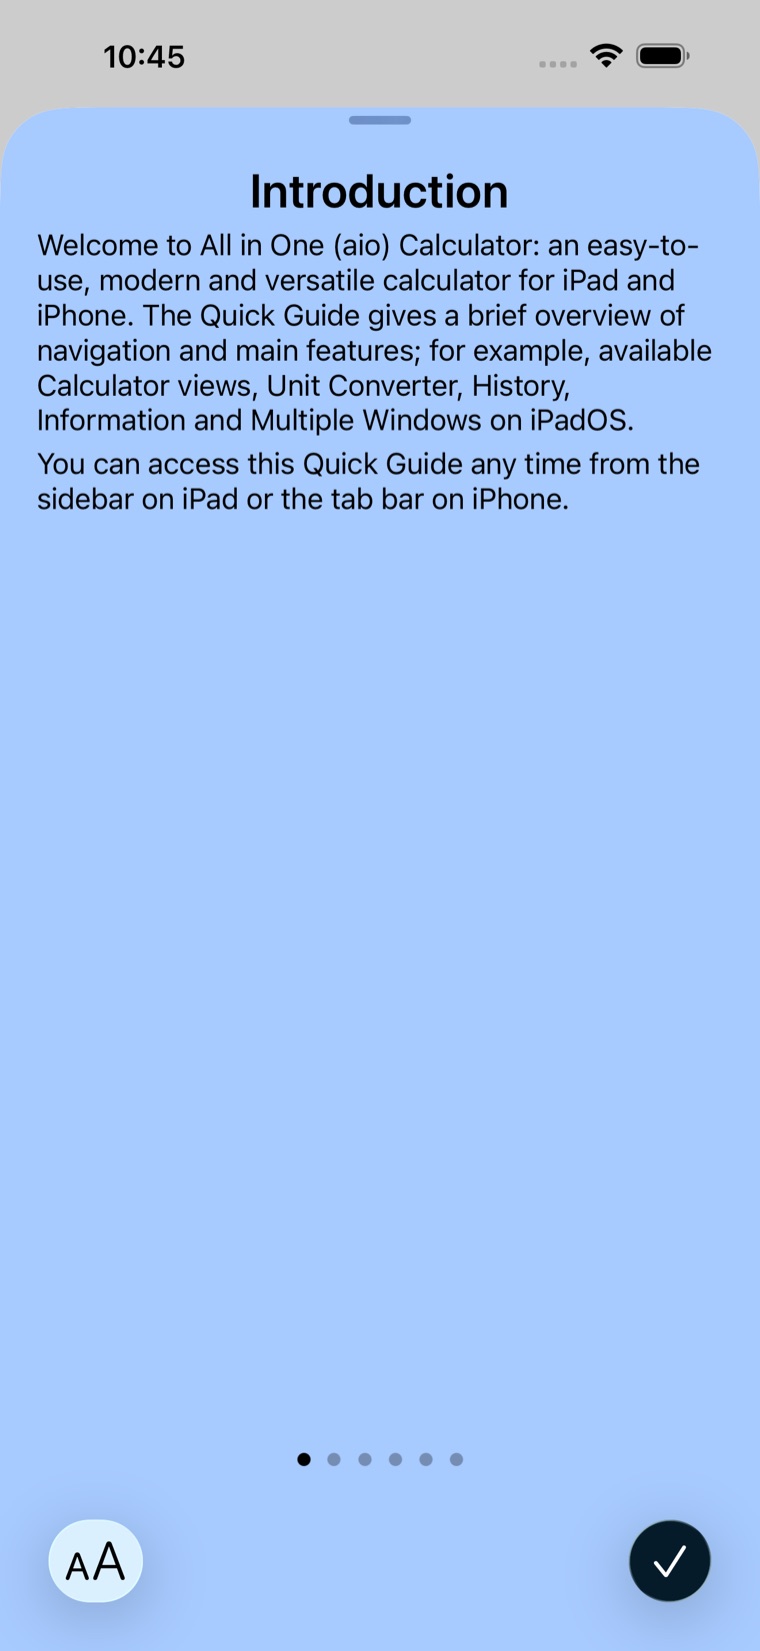
The Quick Guide starts when the application is first used and walks you through basics of the app. You can access the guide at any time from the sidebar or tab bar (in ••• More). The sidebar can be expanded to select a specific topic.
Note: Best viewed in portrait mode.
29 Conclusion
One app covers what usually takes several: three calculator views, a unit converter with close to 500 units in 38 measurements, and a History that keeps your work so you can annotate it, search it and use it again — and, with iCloud, syncs it across your devices, so a result worked out on one is there on the others. It is built for iPhone and iPad, in portrait and landscape, with VoiceOver and Voice Control throughout. Future upgrades will add more features so you don't have to switch back and forth among other apps.
Enjoy our app that, as always, is free and without ads!